Concrete surfaces can accumulate stubborn stains, mold, mildew, and grime over time. Whether it’s a patio, driveway, or walkway, you want to get the job done right so your surface is clean, fresh, and ready for whatever comes next—be that foot traffic or a brand-new coat of stain. In this post, we’ll explore what to spray on concrete before pressure washing, with a focus on whether you should opt for a DIY solution or a commercial cleaner. By the end, you’ll have a clear plan of action, plus tips on when professional services (like our team at CA Pressure Washing) can make all the difference.
- Remove debris and identify key stains
- Prepare a suitable cleaning solution
- Apply cleaner and allow dwell time
- Rinse thoroughly for a clean surface
1. Inspect Your Concrete Surface
Examine the surface area for all signs of existing problems, discoloration, and fractures. Examining the surface helps you identify the specific problems affecting it, including oil spills, mold growth, or thick dirt accumulation.
- Look for cracks: Identify any hairline fractures or major cracks before spraying anything.
- Mark stubborn stains: Circle trouble spots with chalk or note them mentally. Oil, rust, or heavy mold patches often need special attention.
- Assess the damage: Determine if the surface has chipped areas or if the previous sealant is wearing off.
Keep your inspection quick but methodical. Understanding the state of your concrete helps you choose the right cleaning approach, whether DIY or commercial.
2. Remove Loose Debris and Obstructions
Clear the area of leaves, branches, furniture, and other objects. It’s much easier to wash an open, unobstructed surface.
- Sweep thoroughly: Use a stiff-bristle broom to sweep away dirt, gravel, or leftover debris.
- Bag up debris: Collect and discard any organic matter or small objects you’ve swept up.
- Check corners: Look for buildup in corners and near drains. These spots often harbor algae or thick grime that could interfere with the cleaning process.
By removing surface-level debris, you free up the concrete to receive a cleaning solution without layers of dirt in the way, making every drop of cleaner more effective.
3. Decide Between DIY and Commercial Concrete Cleaners
Home-made solutions or specialized commercial products become your main decision at this point. Each has its pros and cons.
DIY Cleaners
- Common Ingredients: Household items like vinegar, baking soda, dish soap, or bleach (in safe quantities).
- Budget-Friendly: Usually cheaper since you already have most of the ingredients at home.
- Less Chemical-Intensive: A good pick if you’re environmentally conscious or need a gentler wash.
However, DIY solutions may not cut through extremely tough stains, especially those that have set in for years or are petroleum-based (like engine oil).
Commercial Cleaners
- Powerful Formulas: Formulated to tackle specific stains, including oil, rust, and heavy mildew.
- Time-saving: They often work faster because they’re designed for targeted grime removal.
- Varied Options: You can choose from all-purpose detergents to specialized degreasers, depending on your needs.
Commercial cleaners, while more effective for stubborn dirt, can be more expensive and sometimes harsher on the environment if not used responsibly. If your surface is heavily soiled or you plan to stain your concrete afterward, the thoroughness of a commercial product often makes it worth the investment.
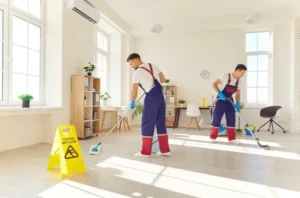
4. Gather Your Cleaning Supplies
Once you’ve chosen your cleaning method, collect everything you need. Having your tools in one place makes the job go faster and smoother.
For DIY Cleaners
- White vinegar or baking soda (or both)
- A bucket for mixing
- Dish soap if you want extra suds
- Measuring cups/spoons for accurate ratios
For Commercial Cleaners
- The chosen detergent, degreaser, or specialized product
- A clean bucket or sprayer
- Protective gear (gloves, goggles) if the product is harsh
- Manufacturer instructions (keep them handy)
Ensure you also have your pressure washer ready with the correct nozzle for concrete surfaces (usually a 25-degree or 40-degree tip).
5. Prepare and Mix Your Chosen Solution
Apply the proper ratios so your cleaner works effectively without damaging the concrete or surrounding plants. Always follow the instructions, whether you’re mixing a homemade solution or a commercial product.
For DIY:
- Vinegar and water ratio: Typically a 1:1 or 1:2 mix of vinegar to water.
- Baking soda paste: A simple paste of baking soda and a few drops of water for spot treatments.
- Mild dish soap: Add a squirt or two if you want more foaming action.
For Commercial:
- Follow the label: Each product has recommended ratios. Don’t assume you need extra cleaner—a stronger mixture could damage your concrete or landscaping.
- Test a small area: If you’re unsure how the cleaner will react, test it on a less visible spot first.
Stir your mixture or shake the container if required. A uniform blend ensures every drop you spray is equally potent.
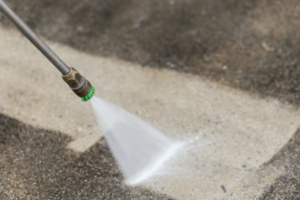
6. Apply the Cleaner (What to Spray on Concrete Before Pressure Washing)
Now for the core action: spraying your chosen solution onto the concrete. This step is crucial in loosening dirt before the high-powered rinse.
- Use a Pump Sprayer or Watering Can: Evenly distribute the cleaner across the concrete, paying extra attention to stubborn stains.
- Soak the Surface: Ensure all areas are visibly wet with the solution. Dry patches mean you might miss pockets of grime.
- Allow Dwell Time: Let the cleaner sit for 5–10 minutes (longer for extremely dirty areas). This soak-in period breaks down dirt, oil, and mildew.
Keep children and pets away from the treated area, especially if you’re using a strong commercial product. Give the cleaner enough time to do its job without letting it dry out completely.
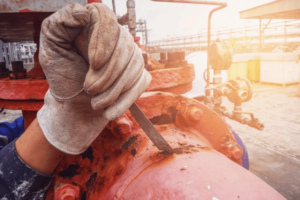
7. Scrub Stubborn Stains
Apply additional elbow grease to spots that don’t look like they’ll come off easily with just pressure washing. If your surface has deep-set oil or rust marks, give them some extra attention.
- Use a Stiff Brush: Focus on trouble areas, applying pressure in small circular motions.
- Reapply Cleaner if Needed: For persistent stains, don’t hesitate to give them another round of cleaner.
- Avoid Metal Brushes: Stick to nylon or natural bristle brushes. Metal bristles might scratch or damage the surface.
This hands-on approach helps lift tough stains from the pores of the concrete before the rinse, ensuring a more thorough clean.
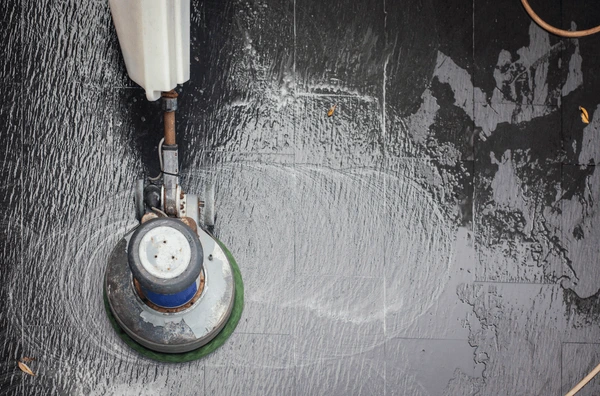
8. Pressure Wash the Concrete
You now have the chance to use high-pressure cleaning to remove the loosened dirt from the surface. Your current action will show you how everything is changing.
- Choose the Right Nozzle: A 25-degree nozzle proves suitable as the standard nozzle type for concrete surfaces. Test on a small area first.
- Start at a Distance: Place the tip 12 inches away from the surface before moving it closer if necessary.
- Move Slowly and Evenly: Wash the surface by using smooth overlapping movements. Quick nozzle movements will result in both lines and uncleaned areas.
Watch the dirt flow off in satisfying streams. Be mindful of any puddles forming—too much water in one place can degrade the concrete if it’s left standing for too long.
9. Inspect and Rinse Again if Necessary
Once you’ve completed the first pass, do a quick inspection to spot any residue or streaks.
- Check High-Traffic Areas: These spots sometimes accumulate more grime.
- Rinse Thoroughly: If you see leftover soap or debris, repeat those sections.
- Look for Missed Patches: Sometimes, corners or edges need another quick pass.
Don’t rush this step. Extra rinse can prevent streaks and ensure your concrete is as clean as possible.
10. Allow the Surface to Dry Before Staining or Sealing
The drying process must finish before applying any stain or sealant to concrete surfaces. Water remaining on the surface will stop new finishing products from attaching correctly.
- Check Weather Conditions: Choose dry and warm weather conditions to enhance drying times.
- Let It Sit for 24–48 Hours: The drying process requires between 24 and 48 hours, depending on the combination of temperature and humidity levels present in the area.
- Test for Moisture: Use clear plastic tape to test if moisture remains on the concrete surface. Your concrete will take at least a few hours to dry since condensation will appear underneath.
You should apply staining and sealing treatment to your concrete after it dries. This ensures a long-lasting.
11. Maintenance and Frequency
Establish a schedule for repeating this maintenance procedure. The regular cleaning of concrete both lengthens its operational lifespan and helps maintain its aesthetic appeal.
- Schedule Periodic Washes: You should perform periodic light pressure washing on your concrete every 6–12 months to stop grime accumulation.
- Spot Clean: Act immediately to clean spots appearing on the surface. The faster you clean stains, the lower their chance of becoming permanent.
- Protect with a Sealant: Concrete surfaces that acquire stains should be protected by applying a high-quality sealant as an additional defensive layer.
Staying on top of maintenance prevents costly repairs and preserves the visual appeal of your exterior space.
12. When to Call Professionals
All DIY projects will eventually reach their maximum capacity. Your severe stains or big surface areas, along with your concerns about damage to the material, require professional assistance for both efficiency and convenience.
- Specialized Equipment: The professional team at CA Pressure Washing operates with high-quality specialized equipment.
- Expert Knowledge: Professionals with training can choose suitable cleaning solutions based on your unique stain requirements.
- Staining and Sealing: Professional service will deliver uniform staining results and prep work for elaborate projects.
A professional pressure washing service supports complete remodeling by allowing customers to combine pressure washing with sealing or staining procedures. Professionals maintain insurance coverage while handling spots that you could miss.
Conclusion: Take Action for a Pristine Finish
A successful pressure washing performance requires proper surface cleaning before the commencement of the process to eliminate tough stains and ensure proper preparation. The proper cleaning solution whether homemade or commercial will simplify your work while delivering superior outcomes for your concrete surfaces. Reach out to the professional team at CA Pressure Washing whenever you need assistance with cleaning or struggle to remove stubborn stains because of limited time.
Ready to refresh your concrete? Our team stands ready to assist you with professional cleaning services as well as stain and sealing options. We are here to guide you toward your desired flawless outcome using our expert knowledge and experience so you don’t need to worry about guesswork or stress.